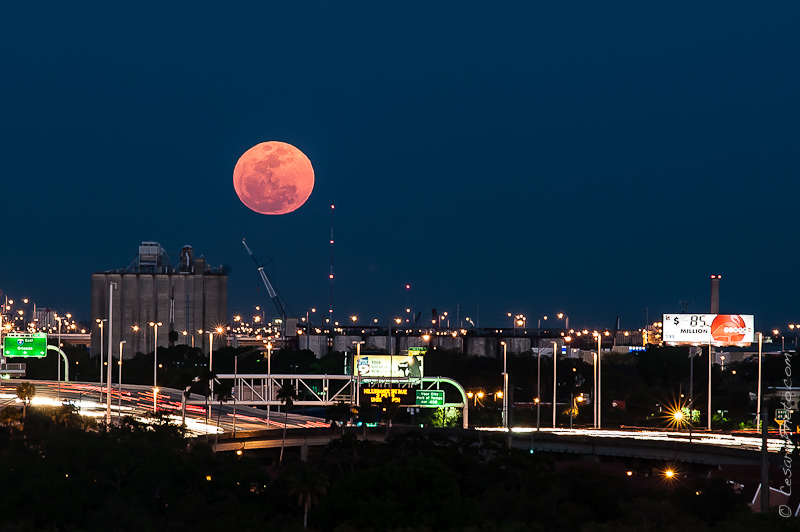
Here are a few tips that will help you next time you want to photograph this fun ball of cheese:
Even if you missed the “super” close moon, these tips will help you with any photography in the sky, especially at night.
- Use a tripod. For all those who said you should use a tripod, some questioned why or said they had taken pictures of the moon without one. The reason for using a tripod is simple. Ideally you want to use a shutter speed that is at least 2x your focal length. But with most people using zoom lenses of 200mm to 300mm, you would be best with speeds of 1/400-1/600+. Based on the math, this wasn’t super likely. So for sharper images, a tripod can help.
- Use a remote shutter release or even mirror lock up. If you do this, there is less chance of camera shake from when you press the shutter button or when the mirror flips.
- Use a fairly fast shutter speed (around 1/125). The moon moves fairly fast, and slow exposures can show movement and thus blur. Also the moon is bright so you do not need to let as much light in as you might think.
- Do not shoot with a shallow depth of field. Most portrait photographers go by the motto, the more wide open, the better. But in situations like this, where you are aiming for lots of detail, you are better off at f9, f11, or even f16.
- Keep your ISO low. Higher ISOs mean more noise. Even at ISO 100, 200, I noticed some noise on my images. I assume it was from cropping in so much since I nailed the exposure.
- Use spot metering. If you are taking closeups of just the moon, spot metering will be your friend. If you spot meter, and expose for the moon, but other items are in your image, they may look like silhouettes.
- If in doubt, underexpose these images. If you overexposure,it will look as if you dabbed a big white paint brush on it with a glow in Photoshop. If you purposely want a glowing moon against a landscape, ignore this specific point.
- Use the Sunny 16 rule for exposing.
- Bracket exposures. Do multiple exposures by bracketing, especially if you want to expose for the moon and clouds. This way you can combine images in Photoshop if needed. Try HDR, you never knows if a good result came out of doing so.
- Manually focus. Do not rely on auto-focus. Instead set your focus manually for sharper images with more detail and textures.
- Use a lens hood. This will help prevent extra light and flare from interfering with your photos.
- Consider what is around you. Most submissions and shares on Facebook and most of my images were of the moon on the black sky. This showed details in the actual moon. But they all start to look alike. Shooting the moon near the horizon with some ambient light and surroundings like mountains or water, had another interesting component to the images.
- The longer your lens, the better. This is not true for a full landscape view of surroundings, but if you just wanted to capture details on the surface, size did matter. I switched from my 70-200 2.8 – as it did not seem long enough on my full-frame Nikon D700. I switched to my Tamron 75-300 for more reach w/ my Nikon D300 (DX). Truthfully, I wish I had a 400mm or longer. I hated how much cropping I need to do in post processing.
- Photograph soon after the moon rises. The moon tends to be more dramatic and appears larger when it comes over the horizon. Through the night it will slowly appear smaller. I was only out for an hour, so I did not observe this myself.
- Rules are meant to be broken. Some of the more interesting images below zwere a result of not following the rules, but instead using creativity.
Now you know, go for Photos!, and share them over my page on Facebook (look for CesarDPhoto.com)
Cesar Out!
